
Silhouette Studio Birthday Card

In this Silhouette Studio tutorial, we will create a simple design print and cut birthday card. We will be using a free photo from Unsplash for the front of the card. The script font used in the sample project is Dancing Script and the Sans Serif font is Coiny. Both fonts are free from Google Fonts.
We will be using layers to organize the contents of our project. This will also help when we are ready to print and cut. The card will be a folded card with a height of 7 inches and a width of 4.625 inches. The width has been reduced slightly in order for the card to fit inside the Registration Marks used by the Silhouette Cutting machine.
Let's start a new project and import the picture.
Cake Photo by Deva Williamson
https://unsplash.com/photos/white-and-pink-unicorn-cake-on-a-pink-stand-TiSLq6Gbftg
The Silhouette Cameo 5 was supplied to me by Silhouette America.
Silhouette, Silhouette Studio, Silhouette Connect, PixScan, Silhouette CAMEO and Silhouette Portrait are either registered trademarks or trademarks of Silhouette America, Inc. Product screen shot(s) reprinted with permission from Silhouette America, Inc.
We will be using layers to organize the contents of our project. This will also help when we are ready to print and cut. The card will be a folded card with a height of 7 inches and a width of 4.625 inches. The width has been reduced slightly in order for the card to fit inside the Registration Marks used by the Silhouette Cutting machine.
Let's start a new project and import the picture.
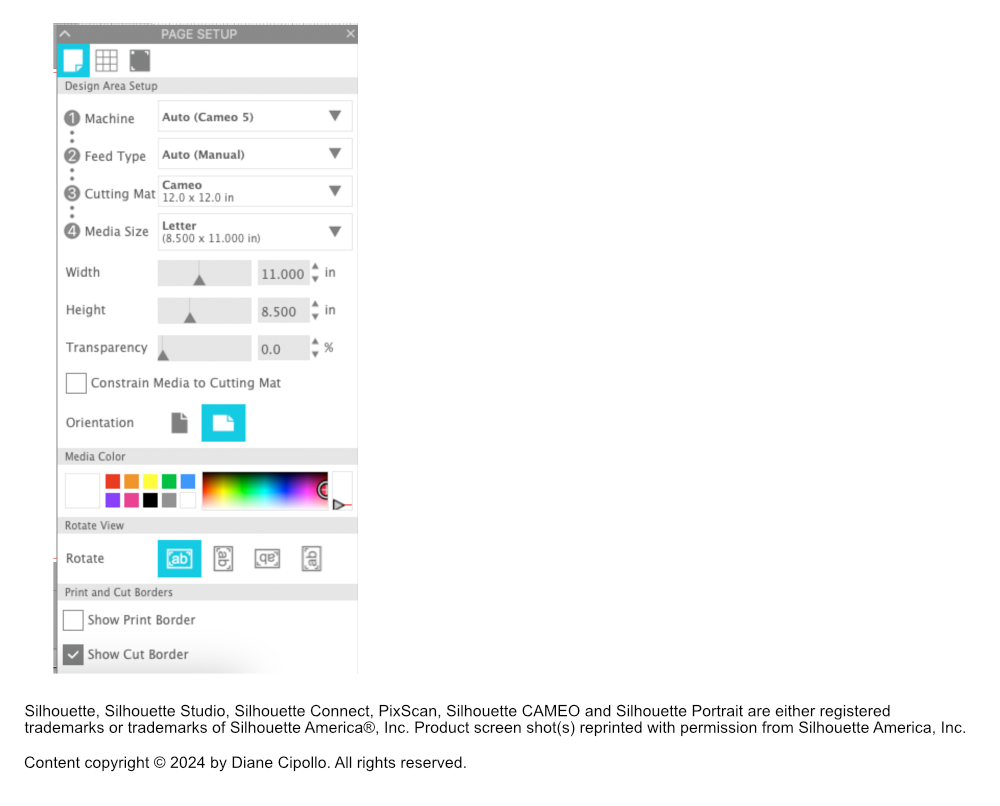
- In the Page Setup panel, set the Media to Letter, set the Orientation to Landscape and turn on the Registration Marks (see screenshot).
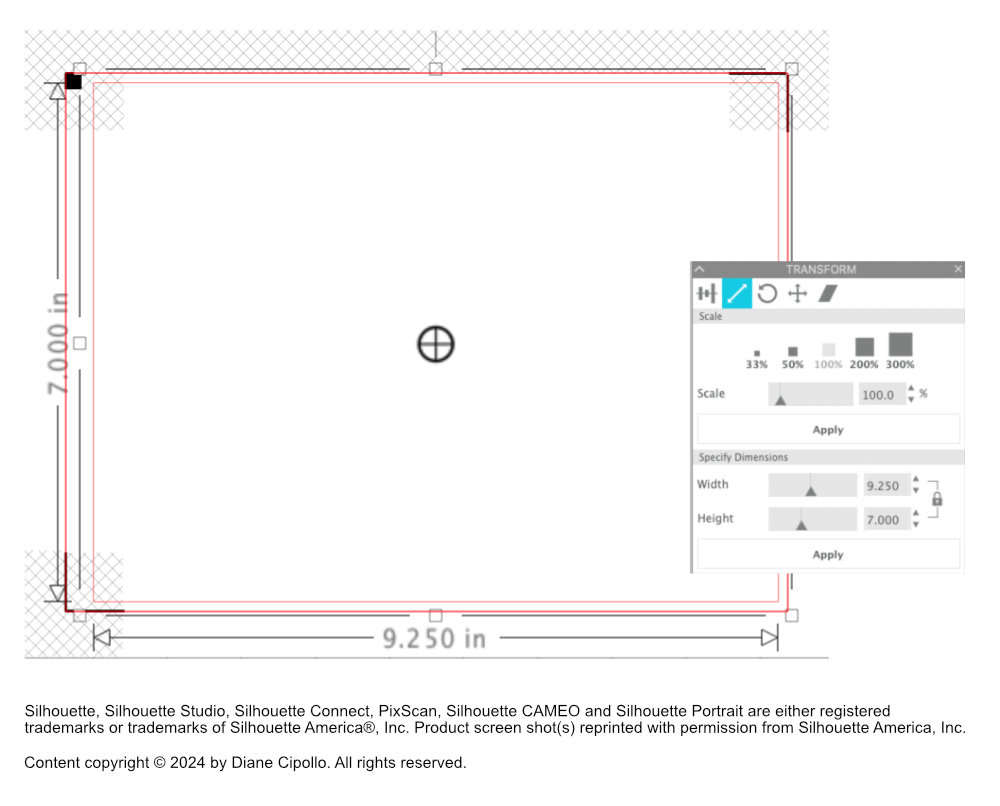
- With the Rectangle tool, draw a rectangle on the cutting area that is 7 inches tall by 9.25 inches wide. This is the card cut line (see screenshot).
- Position the card cut line within the Registration Marks.
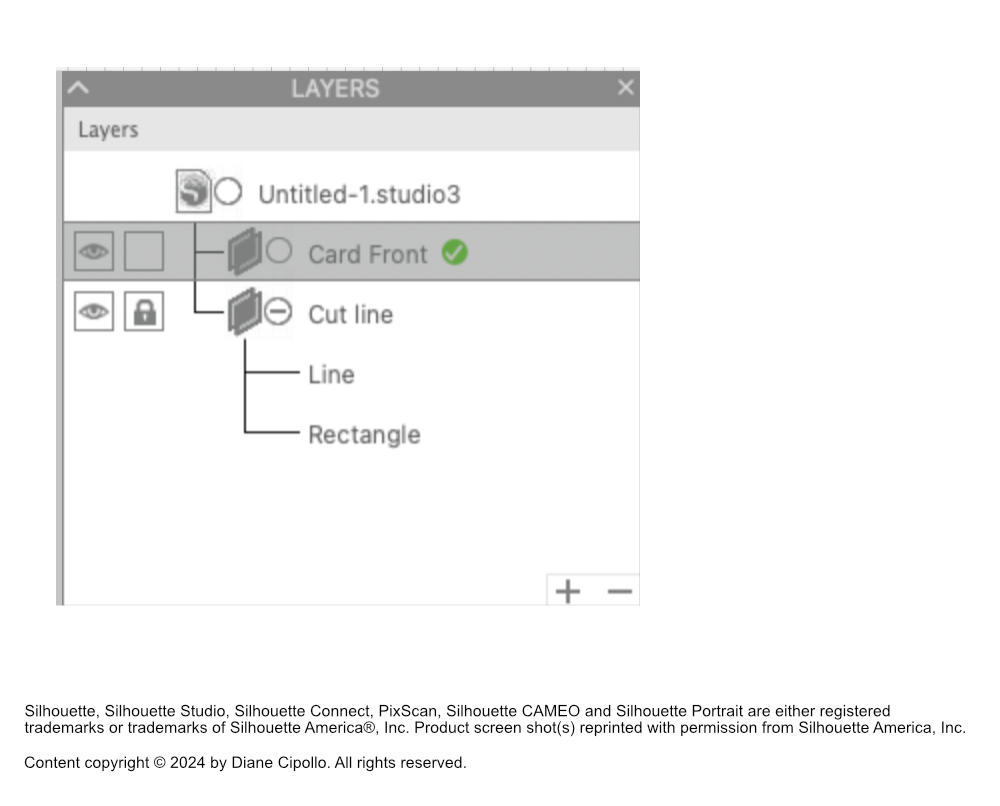
- With the Line tool, draw a line down the center of the card. Set the Stroke Color for this line to blue.
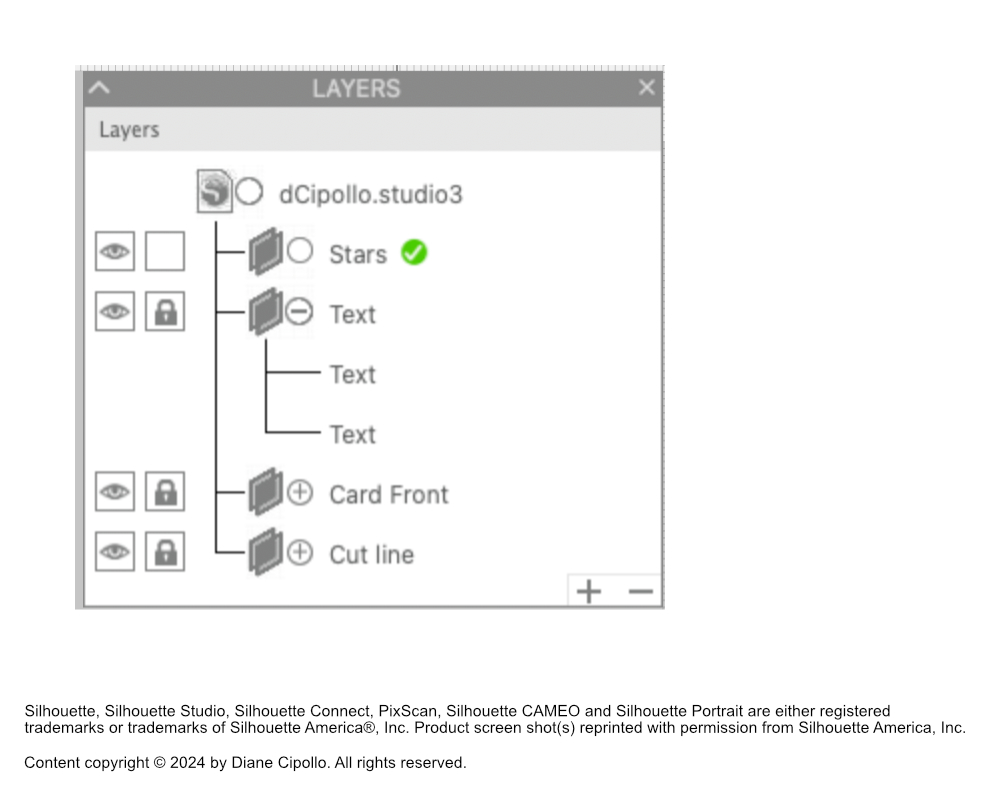
- In the Layers panel, rename Layer 1 to Cut Line. Click the icon to lock this layer.
- Click the Plus icon at the bottom of the Layers panel, to add a new layer to the panel. Name the new layer to Card Front (see screenshot).
- With the Card Front layer still selected, click File - Merge to add the photo into the Cutting Area.
- In the Transform panel, set the Width to 4.625 inches and the Height to 7 inches.
- With the Card Front layer still selected, add Happy Birthday at the top of the card. Change the Font to Dancing Script and the Size to 48 pts.
- With the text still selected, open the Color panel. Use the Eyedropper to set the Fill Color for the text to match the dark cyan on top of the cake. Set the Stroke Color to Null.
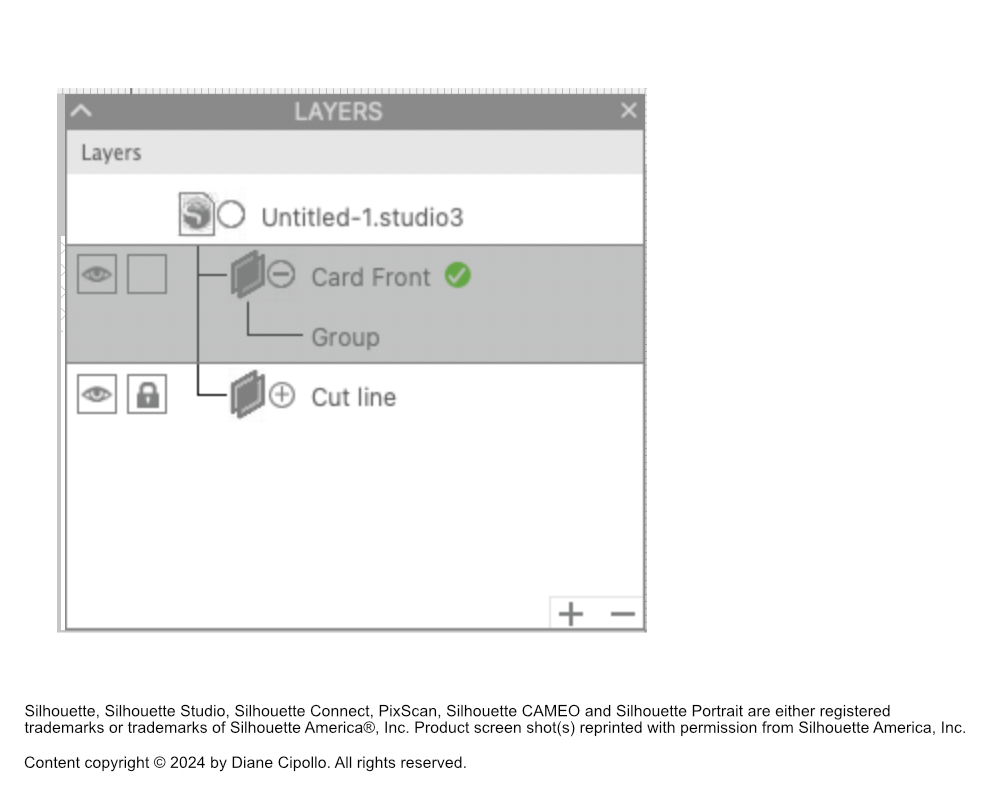
- Select both the image and the text. From the Menubar, click Object - Group (see screenshot).
- In the Layers panel, turn off the visibility of the Card Front layer. Lock the Card Front layer.
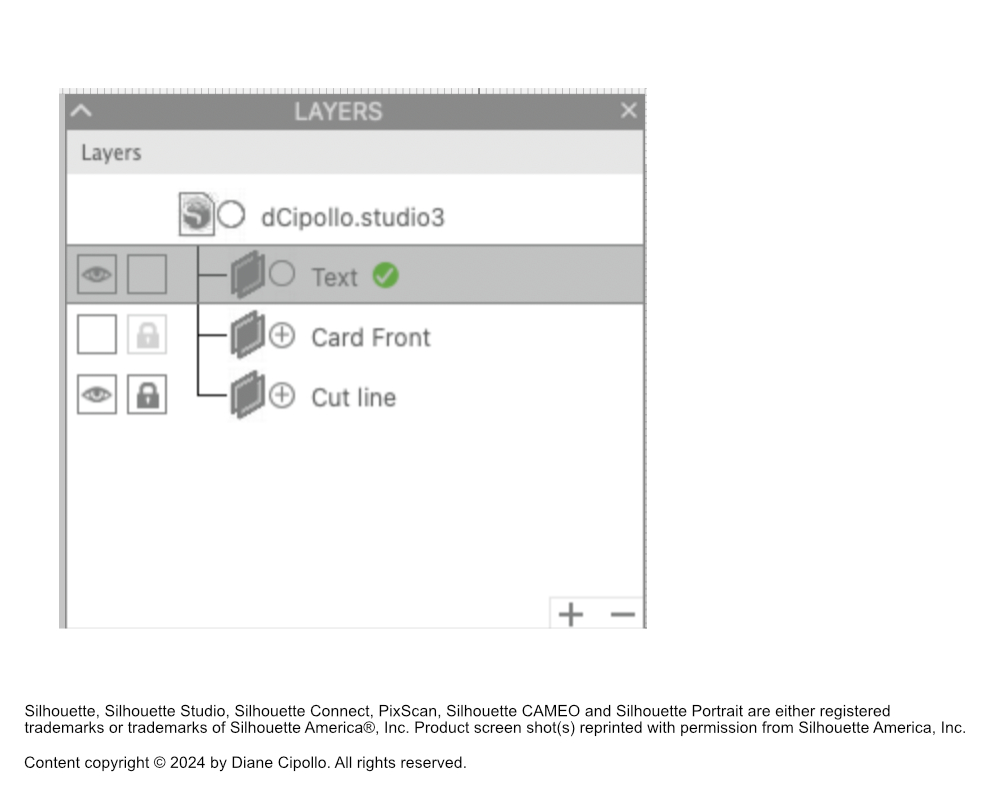
- Add a new layer and name it Text (see screenshot).
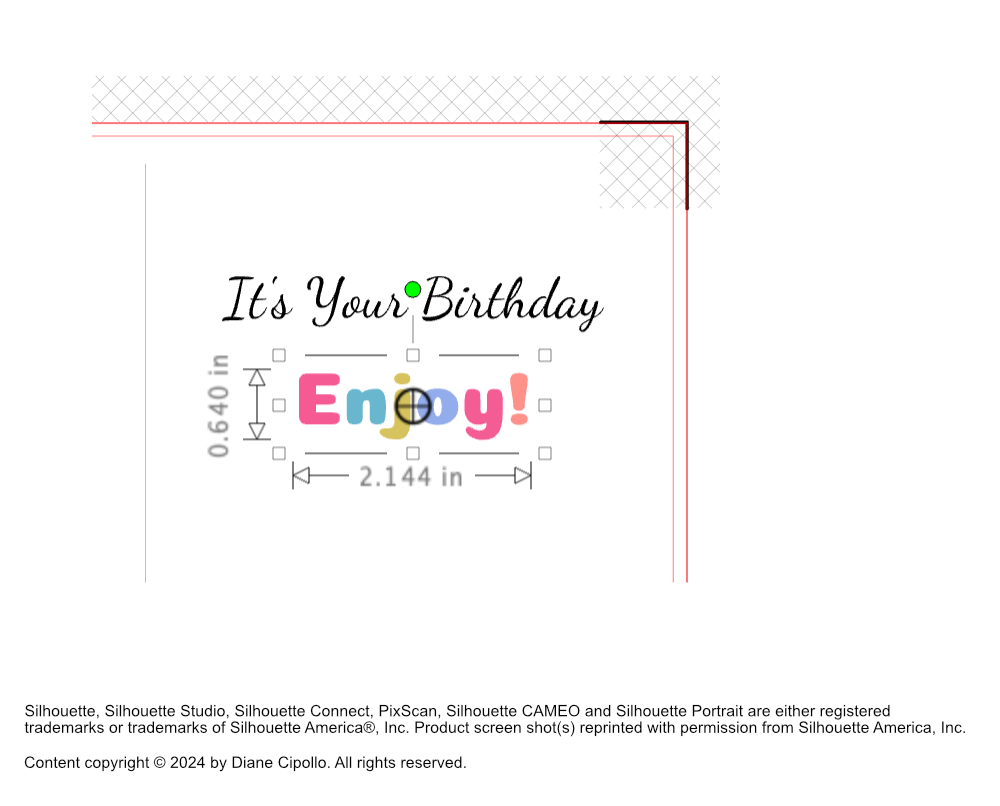
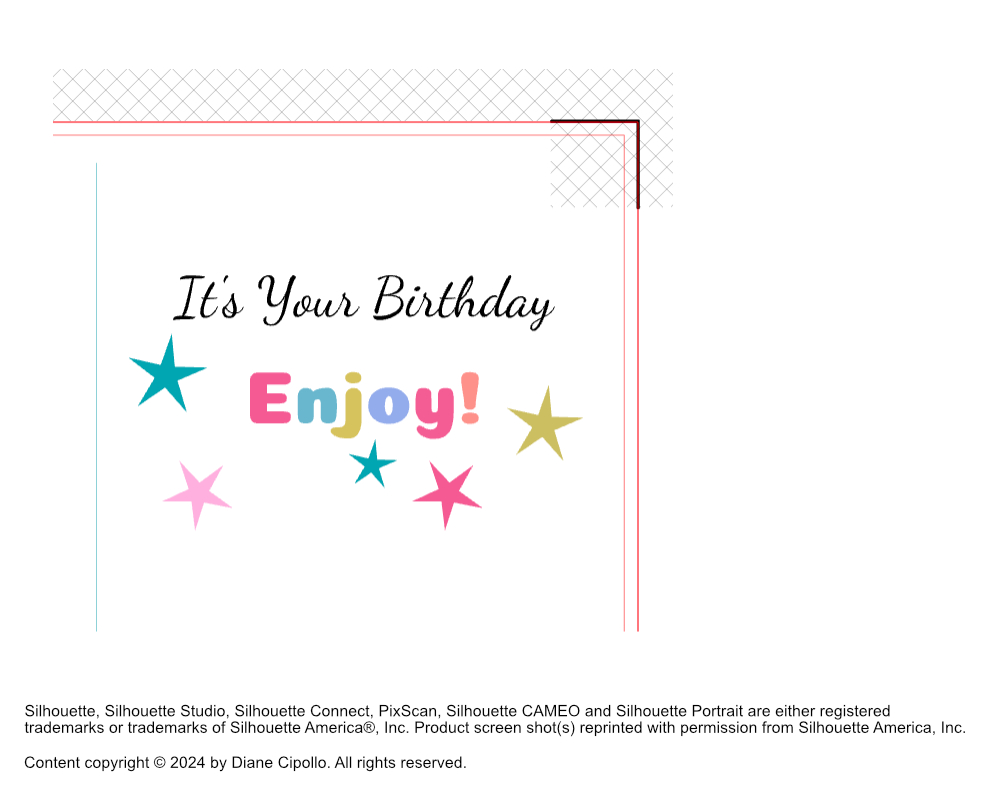
- With the Text tool, add It's Your Birthday. Set the Font to Dancing Script and the Size to 36 pts. Set the Fill Color to black and the Stroke Color to Null.
- On a second line, add the text Enjoy! below the first line of text. Change the Font to Coiny and the Size to 48 pts.
- Turn on the Visibility of the Card Front layer.
- Select only the first letter in the word, which is E. With the Eyedropper in the Color panel, set the Fill Color to one of the colors at the bottom of the card. Set the Stroke Color to Null.
- Repeat the previous step to set each letter in the word Enjoy! to a different color and the Stroke color to Null.
- Lock the Text layer. Add a new layer to the Layers panel and name it Stars (see screenshot).
- With the Star tool, draw a star on to the card next to the text. Use the Eyedropper tool to set the Fill Color for the star to the color of your choice and set the Stroke to Null.
- Repeat the previous step to draw and color a few more stars. Make each star a different size and color (see screenshot).
- Turn off the Registration marks.
- Turn off the visibility of the Card Front layer in the Layers panel.
- From the Menubar, click File - Print to print the inside of the card.
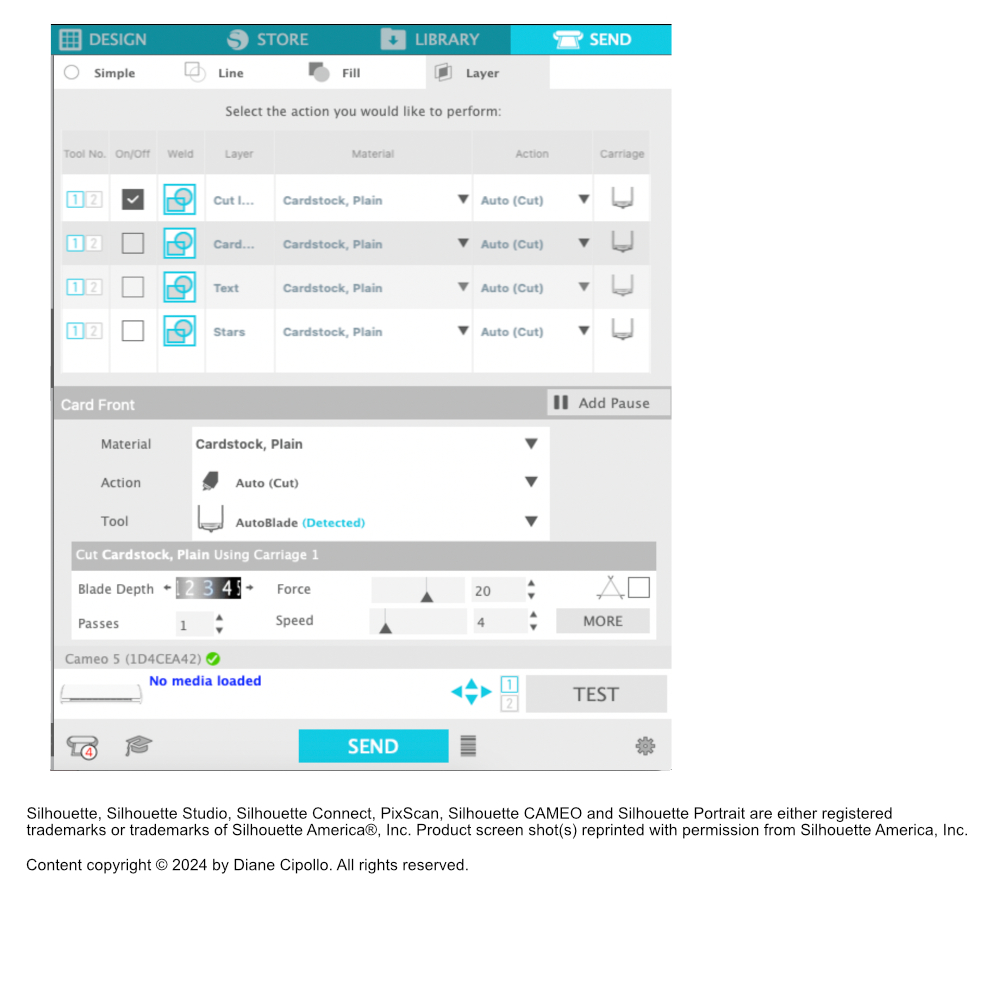
- In the Layer tab of the Send panel, turn off the check marks for all of the layers except for the Cut line layer. This is the only layer that we wish to cut (see screenshot).
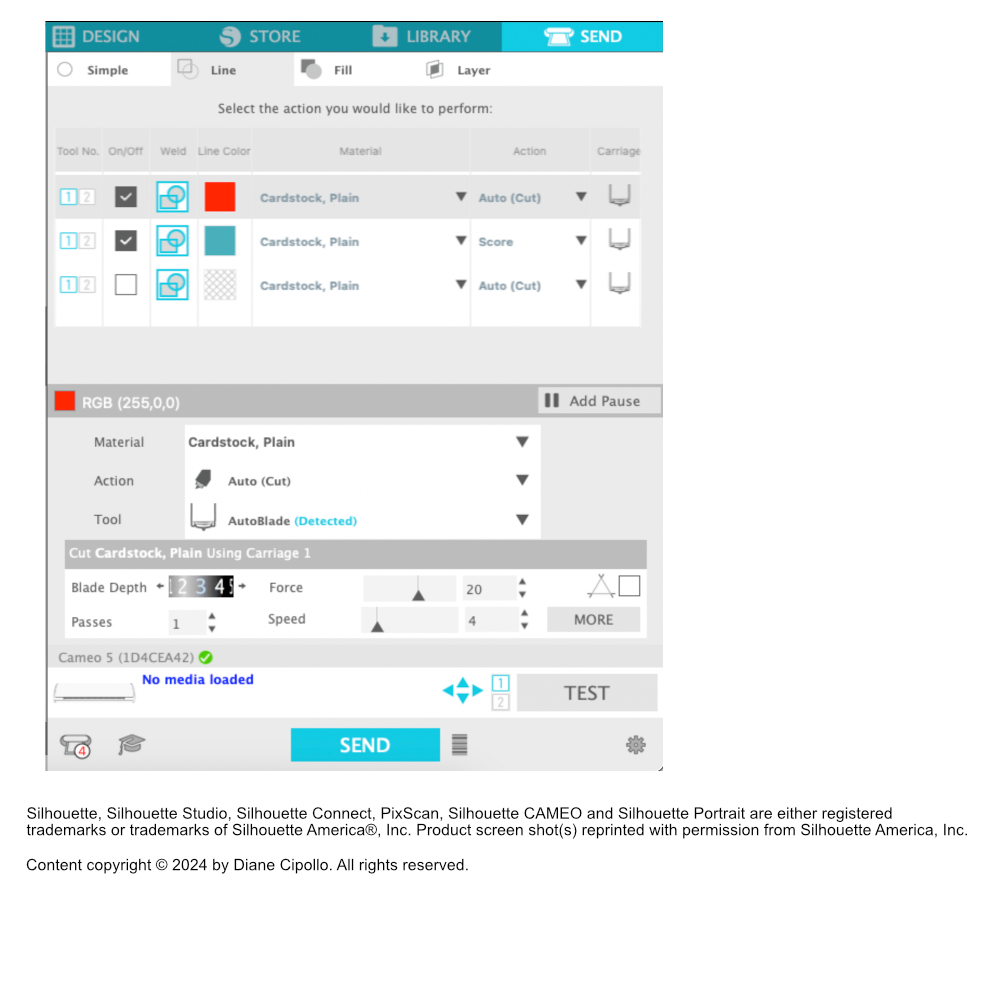
- In the Line tab, keep the red colored line set to Auto(cut) and set the blue line to Score (see screenshot).
- Turn off the visibility of the Text and Stars layers in the Layers panel. Turn on the Visibility of the Card Front layer.
- Turn on the Registration Marks and print the card.
- Place the paper in the cutter with the registration marks showing.
- Cut the card.
Let's draw the fold or score line for the card.
Let's resize the photo to fit the front panel of the card (see screenshot).
This will flatten the cake a little but it will give us room for some text above the cake.
Let's add the text for the inside of the card.
Now we will set the Fill Color for each letter in the word Enjoy! individually. Each letter will have a different color. We will use the colored lines at the bottom of the front of the card for our color palette (see screenshot).
Now we will add several small stars around the text.
Now we will Print and Cut the card. We will print the inside of the card first. Then we will print and cut the card front.
Now we will print and cut the front.
Place the printed card back into the printer so we can print and cut the front of the card.
Cut the card
Cake Photo by Deva Williamson
https://unsplash.com/photos/white-and-pink-unicorn-cake-on-a-pink-stand-TiSLq6Gbftg
The Silhouette Cameo 5 was supplied to me by Silhouette America.
Silhouette, Silhouette Studio, Silhouette Connect, PixScan, Silhouette CAMEO and Silhouette Portrait are either registered trademarks or trademarks of Silhouette America, Inc. Product screen shot(s) reprinted with permission from Silhouette America, Inc.

Related Articles
Editor's Picks Articles
Top Ten Articles
Previous Features
Site Map
Content copyright © 2023 by Diane Cipollo. All rights reserved.
This content was written by Diane Cipollo. If you wish to use this content in any manner, you need written permission. Contact Diane Cipollo for details.


